Pages

Wednesday, March 14, 2012

Bathroom cabinet redo!

Our house is really nicely laid out and designed really well but there's a lot of things that are outdated. The bathroom cabinet in my bathroom was white with gold detailing. The whole bathroom needs updating but I thought I'd atleast start with this.

I scrubbed the cabinet down really well with TSP.
Love this stuff! Really gets the grime off without having to scrub hard.

Then I just went to work paintin away on them, took 2 coats to cover and then I did a final coat just to smooth it over really good. I made sure with each coat to keep the brush strokes going the same direction. I was worried the paint would scratch off easily but it has held up very very well! It's just interior wall paint I had left over.


Now I just need to paint the pink walls! Also need to do somethin with the floor!
Soon:)

Tuesday, March 13, 2012

Family Tree

This post is why I was going to wait to post my other post about trees...
but I couldn't wait so I figured I'd just do two different posts even though their kinda the same.

In our living room we have 3 Dill Green walls and one Chocolate Brown wall on the opposite side of the room as this wall. I decided to use the Chocolate Brown color to make my tree so it would match:)

Wall before with furniture

Living room wall after we moved the furniture out of the way

This was the tree after the first coat.
 It didn't turn out how I had it pictured in my head:/ Every time I tried to make it look like I had pictured in my head I kept messing up so I finally gave in and just let my brush do the work cause it obliviously had a mind of its own today.

After the 2nd coat.
 My plan, once I get more frames, is to hang pics from Randy's side of the family under his pic and pics from my side of the family under mine(including our friends of course) and then in the center area hang pics of Baby Pfaff:)
A few pics hung, still have to get some frames so I can hang more pics.
I don't like how the pics turned out, I don't think it looks as good as it does in person, in person it fills the wall really nicely but to me in the pics it looks small. Ugh oh well!

How NOT to take your own Maternity Pics.

I decided I wanted to take some maternity pics of myself, so first I looked online for lil tips on taking your own pics. There are alot of lovely sites that give really good tips but of course, typical me, I did everything wrong:) so I decided there needs to be a tutorial on how NOT to do your own pics.

I ended up taking somewhere around 70 pics, only 15 were worth saving...shouldn't have even saved that many haha!
After I decided to do this post I had wished I would have kept all the pics that turned out crapy.
I'm of course not going to load all the ones I kept but here are just a few...

So lets get started on what not to do!

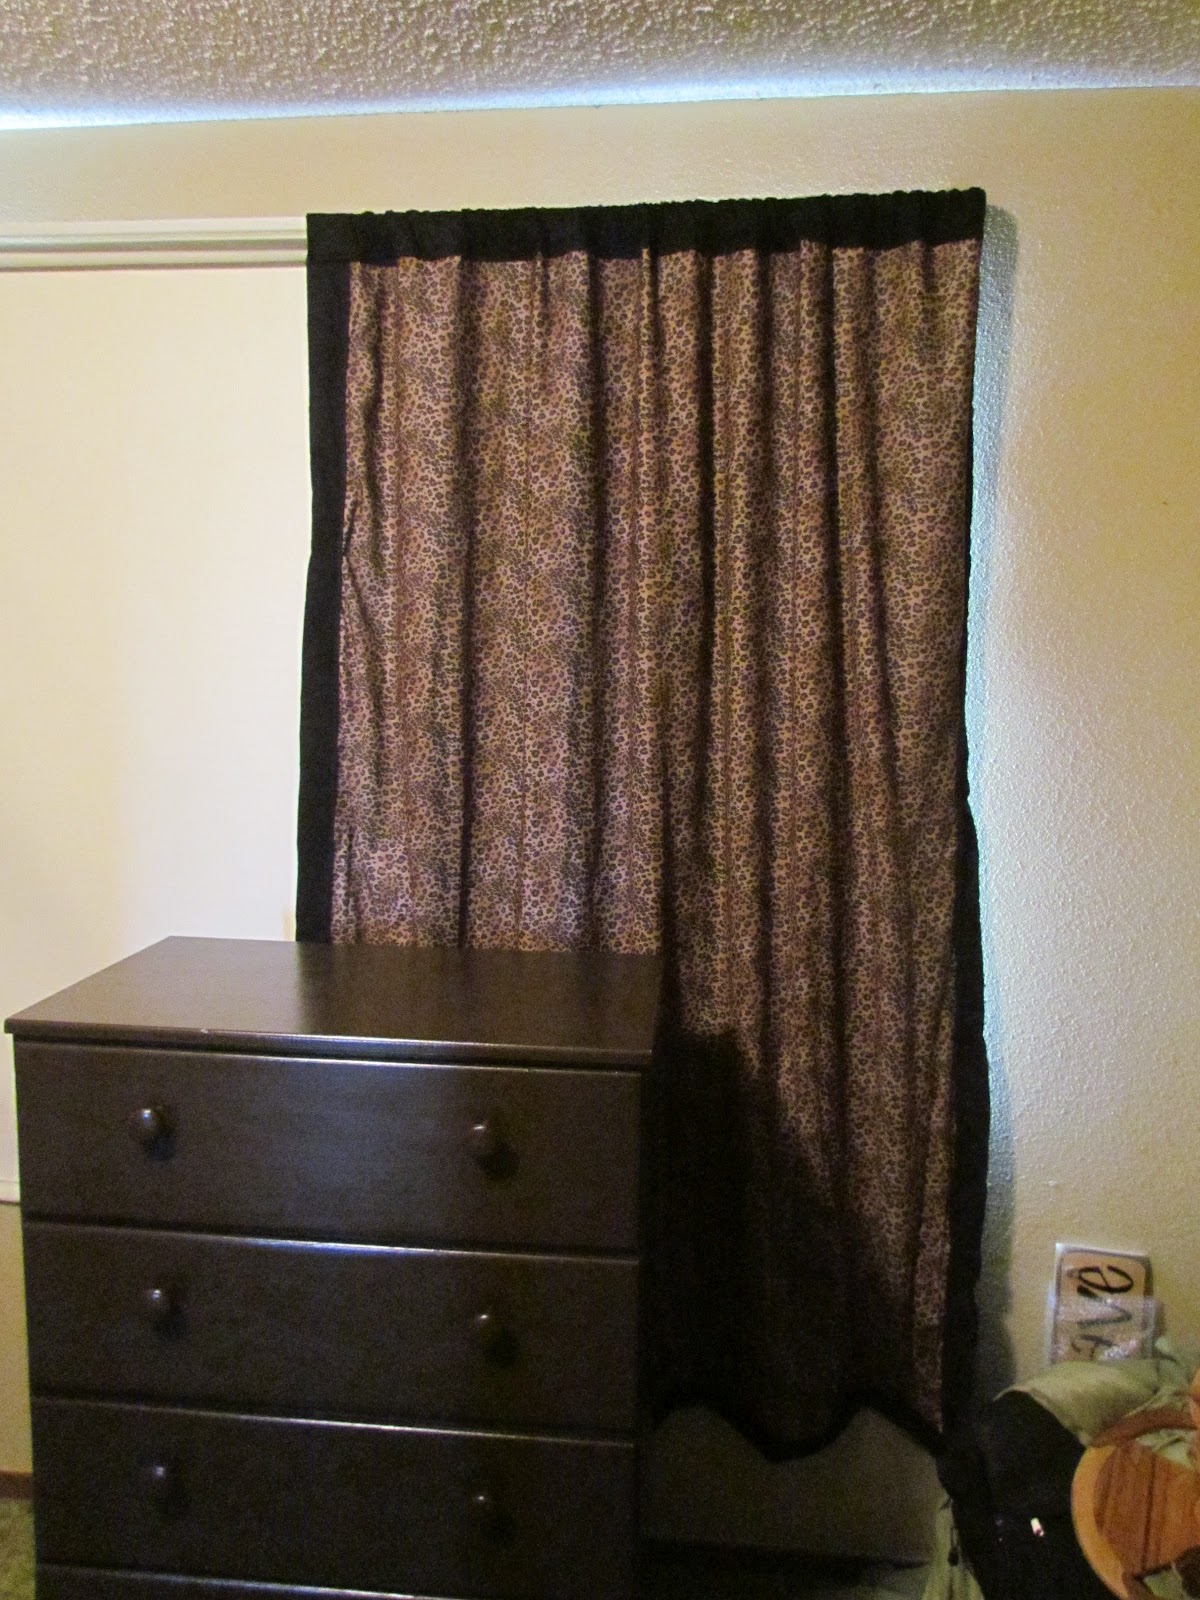
1: Check your backdrop BEFORE you take all the pics and are already changed and have everything put away.

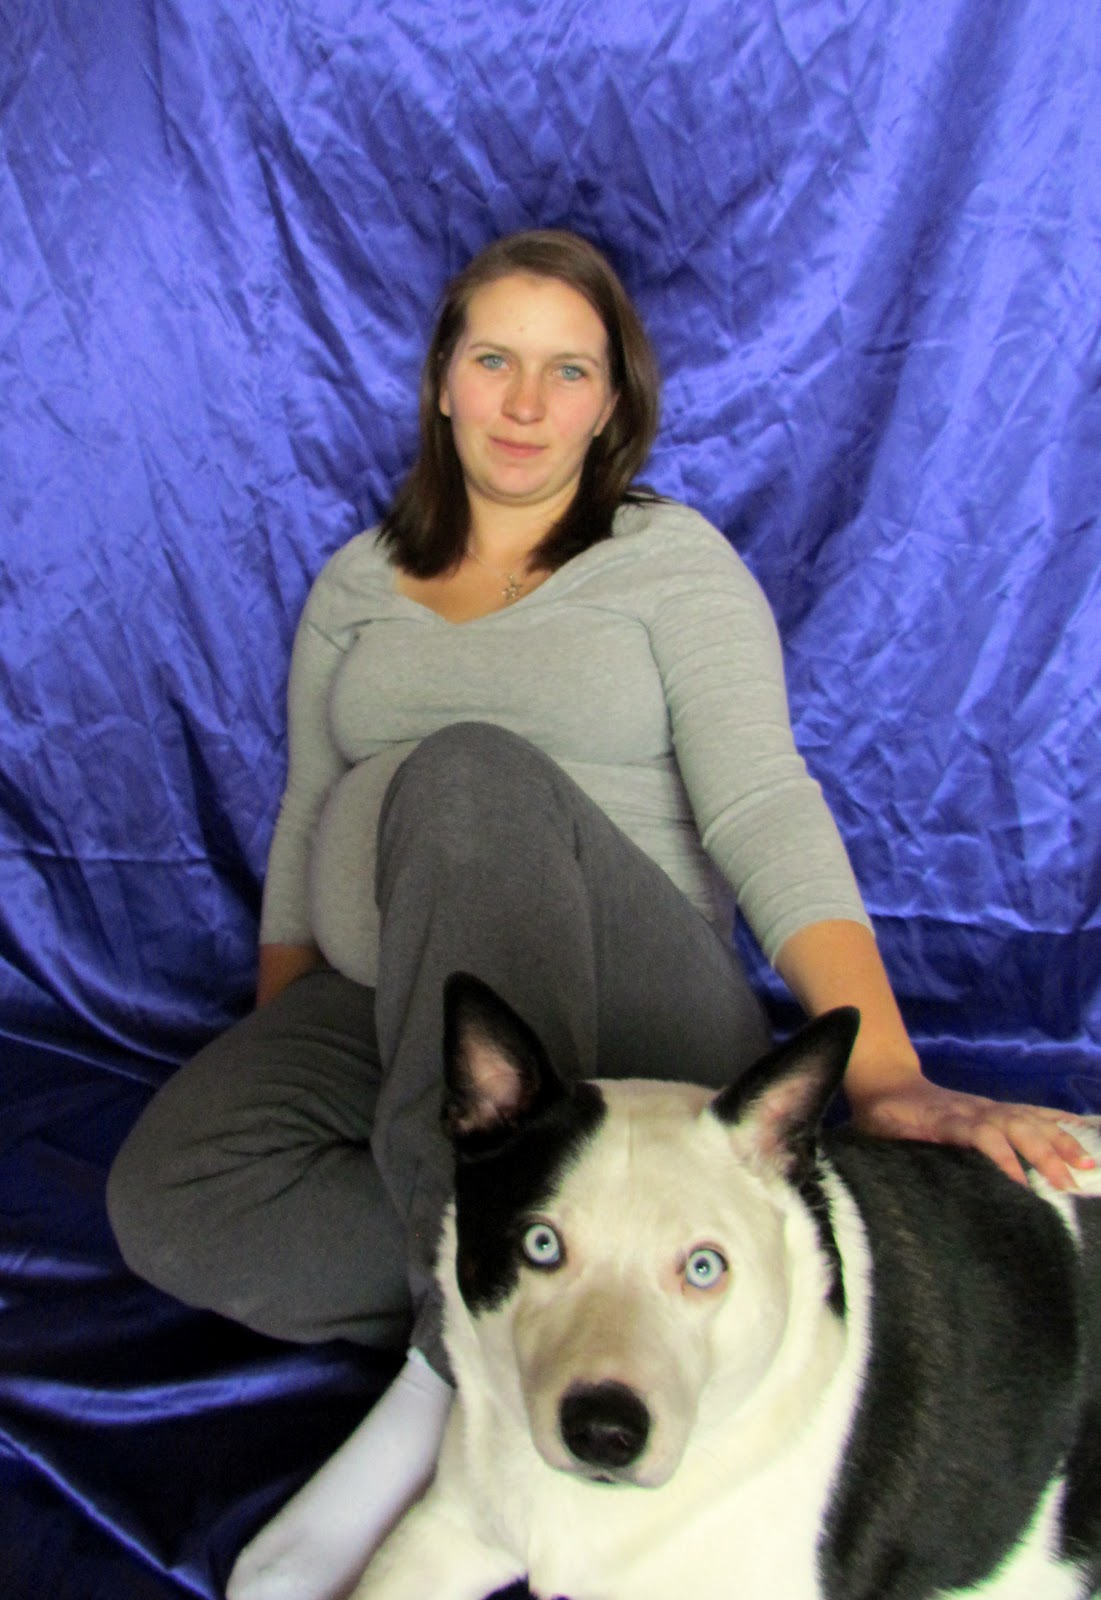
 ^^^^Wrinkly wrinkly backdrop!^^^^ Yuck yuck!^^^^

2: Do take a shower and do your hair and makeup, aparently my pregnancy brain thinks that by taking a pic of yourself that your hair and face won't be in the pic? Hmm don't even know what to say bout that.


3: If you have a dog runnin round the house, maybe consider putting them outside or in another room, half my photos I had to delete because Bobo wanted some attention, he's not super photogenic so most of the pics he ended up standing right in front of the camera, or he'd pose real cute and then move soon as the timer went off!

4: Use a tripod, don't use a soft bottom chair and prop your camera in the position with a glove, your pics will turn out crooked and blurry. I guess pregnancy brain didn't think to dig up the tripod, or atleast use a hard bottom chair.

5: Just paint your damn toenails and go barefoot! I wore socks cause my toenails need painted, BADLY, but I didn't want to do the whole reach and hope the polish lands on the toenail insted of the skin. Alot of the pics my socks are super bright compared to all the other colors.

6: Just save yourself the trouble and have someone else do it, even if its just your hubby. I was exhausted just from having to lean forward to click the button on the camera!

But of course knowing me I'll probably attempt this again:)

Sunday, March 11, 2012

Oatmeal and yogurt

I made an amazingly delicious breakfast this morning!

Food hasn't gotten along with me very well through this pregnancy so I'm constantly trying to find things I can eat, keep down, are healthy and I enjoy. Very hard combination!

Yogurts been good to me so its always a go to snack, Oatmeal has been questionable at times. I don't like just plain oatmeal, to bland to me so I decided this morning to make my oatmeal, half cup of oats and 3/4 cup of milk microwave for 2 minutes then added a cup of my Zoi strawberry cream yogurt and a half a banana sliced all up. It was nummy yummy!!!


Wednesday, March 7, 2012

Coffee filter wreath

 I decided to make a coffee filter wreath but wasn't sure where I'd hang it. Then I decided to hang it in out living room window. It's HUGE and it faces the road so everyone could see it:)

I used foam tubing for the wreath form and coffee filters...
The crayons and paper are for the letters I made that you'll see later.


I dipped the filters in bowls that had food coloring in them, I just dipped the edges cause I wanted to have some of the white showing too.


While I waited for the filters to dry I drew letters that spelt out Happy Easter on them then I colored them in and cut them out.


After the filters dried I bundled them and stuffed them into the slit that runs down the foam tubing. Then I glued them with my hot glue gun.


I just kept goin all the way around the tube till it was covered. The spots I had to fill in I just hot glued the filter right to the foam. I had to turn down the heat to low cause it was a little to warm and was trying to melt the foam.


All done:)


I taped the letters to the window and hung the wreath from string. Now all the neighbors get to see:)


I have to admit just cause it's to funny, the first time I went outside to take this pic I luckily looked at the pic before I put it on here. I realized I spelt Easter Eatser haha! I'm glad I caught that before I posted this!

Monday, March 5, 2012

I miss trees...

I was going to wait to post about this project but decided I'll go ahead and do it now...

I'm from a lovely land filled with trees! I grew up in trees, surrounded by trees, and comforted by trees.
Since my move to the palouse I realize more and more everyday how much trees really meant to me. Of course there are trees here but not like I'm used to. Like our huge yard we have, we only have 2 trees! To me that's an insanely small amount!
Theres also of course trees on the few mountains here but its just not the same as walking out your back door into a forest.

So I notice every project I think of usually involves trees, I usually resist my temptations and try to branch out and use other ideas but recently I gave in:)

When I decided on the theme for our baby's room I thought at first I'd do an African style tree on the wall since the theme is Safari. I decided with the wall being textured I didn't feel like attempting a super detailed tree. Then I decided I'll just do my own style of tree....


When I decided on this it took me a couple days to muster up the courage. For some reason it just seemed a little scary even though I knew it would be easy to fix any mistake. I think I just over thought it and worked myself up. I just wanted to make sure it turned out perfect. Soon as I started though it was easy sneezy! I LOVE how it turned out and I can't wait to do another!


First I was going to use craft paint but then I decided just to do a silhouetted tree, so I just use some left over brown paint I had. I had planed on drawing it first with pencil but as soon as I tried my first mark I realized I could barely see the pencil so I just free handed it, this made it tons easier! I suggest if anyone decides to do any kind of wall mural to just free hand it and have fun with it any mistakes really are easy to fix.

Thursday, March 1, 2012

Curtains.....GRRRRRRR!!!!!!!!

Ugh! Terrible idea making curtains! After bein on a roll making all kinds of things for Baby Pfaff's bedroom I thought, I'd love to hang some cheetah print curtains in there! So of course first I looked online for curtains but they were all super spendy, I think the cheapest were somewhere around $50 after shipping. I knew I could find some cheaper but then I thought why not make them myself cause I can probably do it for WAY cheaper. WRONG WRONG WRONG!

But I'll tell you how I did it anyway...
I found some nice cheetah print fabric at Walmart for only $2.00/yard so I bought 4 yards.
Then I seen they had some cheap sheets and I thought that would be perfect for the back side!
I tried to do the math in my head of the size of sheet I needed but of course with my not so good at math brain with a dash of pregnancy brain I got it wrong. I thought for sure a queen size would be plenty big enough. It's not.
So I bought the one queen sheet for $10
At this point I thought it was all I'd need so I though $18 not bad!


When I got home I got started and from beginning to end it sucked and I even ended up taking almost a week break on it just cause it pissed me off so much! Every time I seen that stupid thing sittin on my table it made me more and more pissed!

Of course AFTER I had already cut up the queen sheet I realized I needed more material so I couldn't just take it back and get more.

I put together the materials and sewed them together best I could, it's terrible crinkly and doesn't fit together well, I couldn't find my stupid iron so I had to just go for it with out.
I folded over the black backing so I could have a nice black trim around it.


It looks ok now that its done and hung up but it still pisses me off. I only have the one done and now I'm gunna have to do the other side. BARF!
My advice, don't make your own curtains! Just buy the stupid things;)

To sum up this lovely mistake,
I thought they were going to cost me $18 but once I get the other sheet for backing I'll have $28 into it. Still not terribly over priced but I could have bought a cheaper version for the same price and saved myself the headache.
Oh well not every craft turns out perfectly.